My Warm, Toasted Fall Glow Tutorial
Hi everyone and welcome back to the Subtl Beauty YouTube channel. Tabatha here, and today I am walking you through exactly how I created this warm, toasted, fall glowy makeup look. This trend is golden, cozy, and super wearable for the season, so I am breaking down every step and every product I used so you can recreate it right along with me.
Step 1: My Light, Skin First Base
I start this look with my Subtl Beauty Cream Concealer, and I actually use it as my all over base. I like to keep things light and natural, so I only place it where I truly need it.
Here is how I apply it:
-
Chin
-
Outer edges of my face
-
Under my eyes
-
Whatever is left on my brush goes over my eyelids
This gives me a soft, no makeup makeup finish that still looks fresh.
Step 2: Warm Toasted Cheeks With Terracotta Tour Guide
Next, I go in with Lip and Cheek in Terracotta Tour Guide because I wanted this look to feel very warm and sun-kissed.
To make sure I do not apply too much:
-
I tap it on the back of my hand first
-
Then I build it up slowly on my cheeks
This shade gives the perfect toasted flush for fall.
Step 3: Golden Glow With Champagne
Now for one of my favorite steps. I use Cream Highlighter in Champagne, which is the most gorgeous warm gold.
My tips:
-
Warm it on the back of your hand so it melts into the skin
-
Apply with your fingertip to the tops of the cheekbones
-
Add a little down the bridge of the nose
It brings so much warmth and glow to this look!
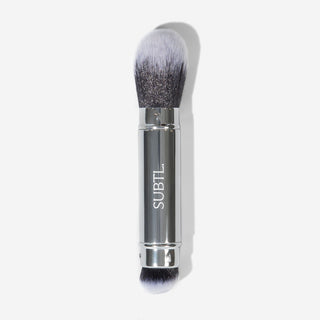
Step 4: Set Everything With BB Powder
Once all my cream products are placed, I take my BB Powder with the Dual-Ended Face Brush.
I use the fluffy end and:
-
Lightly set my whole face
-
Bring it up to my eyelids so my eyeshadow goes on smoothly
-
Dust it down my neck
This keeps everything soft, blended, and ready for eyeshadow.
Step 5: My Soft, Warm Eyes
For the eyes, I wanted something warm and dimensional, but still easy.
Here is the breakdown:
In the crease
I take the matte side of the Staycation Eyeshadow Duo
-
Apply it with a fluffy brush
-
Use windshield wiper motions
-
Bring it slightly into the inner corner
Outer corner
Then I switch to Dune
-
Pack it onto the outer corner
-
Blend it back into Staycation
The shimmer
I'm actually going to use Cream Highlighter in Espresso Martini as a shimmer shadow.
It gives the most perfect bronze glow on the lids and applies beautifully as a cream eyeshadow. I am obsessed with it for fall.
Step 6: Warm Up With Bronzer
I take my Powder Bronzer and a fluffy brush to add a little more warmth.
I place it:
-
Along the cheekbones
-
Into the hairline
-
Down the jawline
-
Across the ears for a seamless finish
It really helps tie everything together.
Step 7: Extra Flush With Apricot Avenue
Because I wanted this to feel very warm and cozy, I went back in with Powder Blush. I used Apricot Avenue and placed it:
-
On my cheeks
-
Blended up toward my temples
-
A little across my nose
This combination of terracotta and apricot is so good for fall.
Step 8: Natural Brows
I quickly fill in my brows with Brow BFF in Taupe using a very light hand. Then I fluff them back up. I like to keep them natural but polished.
Step 9: My Fall Lip Combo
For the lips, I line with Raspberry Room Service Lip and Cheek using my Lip Brush. I focus on outlining the outer edges of my lips.
Then I take Magnetic Lip Glaze and keep that more in the center for dimension. I love how warm and rich this combo looks.
Step 10: Lashes to Finish the Look
I curl my lashes and add a coat of mascara. I skip the bottom lashes most of the time, but it is personal preference.
The Final Look
And that is it. This is my toasted fall makeup routine and I am truly obsessed with how it turned out. Using Espresso Martini Cream Highlighter as an eyeshadow might be one of my new favorite tricks. The glow, the warmth, the soft blend of terracotta and apricot, it all just screams fall in the best way.
If you recreate this look, please let me know. I cannot wait to see your versions. Until next time, bye.